Showing posts with label Drills. Show all posts

Thursday, July 24, 2014

Rugby Tackling via Pete Carroll

Courtesy of HUDL


Monday, February 11, 2013

Wide Receiver Drills: Jason Phillips

This is one of my favorite fundamental drill videos as coach Jason Phillips packs a ton of useful tenets for receiver play in this short video.  At my last stop, we attempted to hammer home the basics presented here (stutter release, stick breaks, leveraging defensive backs to open up the break, and body lean) and it made a  world of difference in getting these guys to understand what it takes to be a threat at the receiver position (you just can't "run routes")


**happy mardi gras!

Thursday, September 22, 2011

Catch-Man Technique


We’ve touched on this trend before and I believe it will be the trend for the future of defenses as they continue to aggressively adapt to passing offenses.  It used to be that when you played man coverage, it was required that you dogmatically adhere to tight or press-man technique and relied on disrupting routes and pressuring the quarterback.  This pretty much meant your defense needed to out-athlete the offense you were facing as well as showing your intentions pre-snap if the offense ever presented a one-back formation.

As defenses adapted through the 90s and offenses began finding more and more success passing the football, zone defenses were forced to evolve to pattern-matching routes.  Matching out of zone with six defenders would leave an extra hole player against five receivers.  The natural progression from this was the fire-zone, adding a zone defender to an overloaded pressure while accounting for all receivers.  Fire-zoning became (and continues to be) a catch-all solution with static pre-snap defensive looks.  The only issue would be the ability to retain alignment leverage without giving away your intentions   For this reason, fire-zones are largely packaged by field and boundary rather than strength of formation.

So what would be the next step for defenses to get a jump on playing a variety of routes while providing the capability of overloaded pressure?  In the perfect world, the defense that could ensure it:
  • retained its pre-snap coverage shell (consistent look)
  • got the favorable personnel matchup
  • was able to generate an overload pressure on the passer

A defense that could do that would be able to hold the chalk last in this new age of offensive football.  "Catch Man" or "off-man" coverage means exactly that; the defensive backs catch the route as it develops.  Because this 'catch' won't happen until well into the route, the overall defense can assume any shape/structure (1-high / 2-high) it wants without giving many pre-snap clues to the offense.  From basic pre-snap zone looks, the defense could be fire-zoning or playing man and very likely will be bringing pressure, but from where?
    clip_image002clip_image004

    This ‘answer’ kind of becomes a full-circle evolution, where many successful defenses are returning to a formula that was relied upon 30 years ago.  It isn’t surprising that the leaders of catch-man defenses are protégés of the Buddy Ryan school of defense (Gregg Williams, Rex Ryan, Rob Ryan, Dom Capers) of the 80s.  Many of the more advanced elements of Buddy Ryan's late 80's-era 46 defenses (catch man, loaded coverage, fire-zones, swipe/thumb coverage, and a reliance on man-free) are what is now en vogue in today's game.  This wide array of skill sets also begets a need to include multi-functional personnel on the field, where a 3-man fronts (or less) are preferred (see psycho posts).
    clip_image006clip_image008
    clip_image010clip_image012
     
    In this post, we’ll try to provide some coaching insight into developing the skills for effective catch-man coverage. This concept was admittedly difficult for me to get comfortable with many years ago, as I really believed in the old bump-and-run technique of man coverage. I felt that you had to immediately disrupt routes and out-leverage a receiver before he even began his release. While there are benefits to holding up receiver stems and immediate reroutes, there is limited flexibility in adapting to formations using this technique. The effectiveness of press can be diminished with pre-snap movement from the offense. With catch-man, you can get the best of both worlds because the coverage structure remains consistent, you can effectively play quick and deep passing game, while still disrupting receiver stems.


    Added for illustration purposes, this Revis 1-on-1 footage highlights how to leverage a receiver from many different alignments (some off, some press but they all essentially turn into the same type of coverage by the time the receiver makes his break).

     
    With the help of video, I hope to illustrate some of the techniques and methods of leveraging routes from an “off” alignment. The skill sets used for catch-man are also helpful in other coverage (press man / pattern-match) techniques, so using these drills will have carry-over (high ROI) for your secondary. The depth of alignment for the defensive back usually starts at 8 yards. From this depth, a defender could essentially stay put and the receiver would likely make his break in front of the defender. As the player gains more confidence (athletic ability allowing), this pre-snap cushion can be shortened and stemmed in and out of. The beauty of this is that just aligning in the path of a receiver’s stem, the defender has already re-routed the receiver; either the receiver runs over the defender (not conducive to actually running the route) or he is forced to make his break early, declaring how the defender will play the route.

    Just like pattern-matching in zone, secondary defenders will play routes based on the drop of the passer, then anticipating route breaks based on a process of elimination. Once the route is identified/confirmed, the defender can jump the interception point or secure the tackle.

    Catch-man is best delivered to players by staging teaching into depths of the quarterback drop. Just like pattern-matching, you will get specific routes based on the depth of the drop.
    • With quick-step or 3-step (quicks 0-5 yards), a receiver could really only run one of the following routes: Screen, slant, hitch, speed out
    • With 5-step routes (intermediate 10-15 yards), the receiver would likely run: out, curl, hook, dig, comeback
    • With deeper routes (15+ yards off of 5-7 step drops / sprint out and play-action) you could expect: post, corner, fade wheel
    As you’ll see in these videos, defensive backs start at a depth of 8 yards and are keying the quarterback in their initial pedal.
     
    While eyeing the quarterback, the corner will slowly come out of his stance in a crossover step (or backpedal). The key here is for him to remain in control of his body with an arched back with the intent to be able to mirror the receiver perpendicular to the line of scrimmage (inside/outside break under 6 yards). If the receiver stems inside, the corner should laterally step inside to mirror him. Again, it should be stressed that the corner should walk out of his stance, reading the quarterback in slow motion, keeping horizontal leverage on the receiver (mirror him). By using this horizontal leverage, he can easily recognize where the quarterback is going with the ball (based on the angle) and attack the interception point.

    If the corners are consistently aligning with 8 yards depth, they will likely see a lot of quick game to attack the cushion. When the receiver breaks under 8 yards, the corner shouldn’t attempt to come underneath the receiver for the interception unless he is certain he can get two hands on the ball. Otherwise, he should look to secure the tackle by coming in low, with arms clubbing up and expanding the receiver’s noose. It should be acknowledged that playing 3-step is difficult. The important thing is that the defender doesn’t give up a double-move or lose the 1-on-1 tackle if the ball is caught. In the event the DB gets beat here, he should cut his loses by collisioning the receiver or actually pulling him down (preventing a sure touchdown).
     
    Once the defender sees the drop is greater than 3-step, he accelerates his pace and immediately snaps to the receiver, keying the inside hip. The defender will then fight for control of the receiver with leverage (either hip-to-hip or at least be at arm’s length). If he loses this control (out-of-phase), the priority is just to catch up to the receiver and never look back. To help against false stepping or getting beat on double-moves, its important to rep receiver jukes, that a cut can only be made when the receiver’s shoulders rise up. Once the DB recognizes the drop is greater than 3-step his thinking is to “slowly absorb the route” and close any air that exists between the receiver and defender. With the accelerated pace of this deeper route, the defender’s concentration should be solely on the receiver’s inside hip. From this point, there is little that differentiates itself from traditional (press) man coverage. The defender should work for total control of the receiver with the progression of “receiver – recognition point (break) – ball”. Only until the receiver is controlled with leverage and the route break is identified, should the defender actually play the ball for the interception. Always finish – play the man, THEN the ball.

    Like I said, this will likely be a defensive flavor we’ll see more of in the future and your thoughts and experiences on the matter are certainly welcome.  For an added bonus, some more video on leveraging receivers (from a press position, but its all relative).  Key points to take note of are the solid base and stuttering of the corner's feet until the receiver truly commits to a release and then the flipping of the hips (and footwork) to maintain the in-phase relationship….


    Thursday, April 7, 2011

    Cover 2 DB Drills: Raheem Morris


    Some cornerback drills care of Raheem Morris during the dominant years of the Tampa Bay Buccaneers defense featuring one of the most physical corners in recent memory, Ronde Barber. 

    There are some great stimulus-response drills to handle #1 receiver stems (inside, outside, vertical) and run-support leverage.  This starts with individual work handling stems/breaks, then moves to leveraging specific routes (out of C2).  With group work, these same recognition work is carried over and speeds up the “looking for work” process when #1 clears.  The film concludes with team practice clips against Gruden’s offense (against Cover 2).


    Be sure to check out past Cover 2 entries for more in-depth writing.

    Thursday, March 31, 2011

    Thinking Out Loud…

    I’m not coaching (again) this year.   Part by choice – part by schedule (conflict).  When you are away from the frying pan, you are afforded the luxury of a perspective without any critical timeline.  When  you’re not confronted with an instant-response requirement to develop a plan for the next game or (during the spring) the next season’s practice structure anything can seem like a good idea.   During the spring, your team is full of potential and beaming with unchallenged optimism.  You will try new things, looking for any edge you can find to become even better than you were last season to improve your players performance to a higher, more efficient level.

    Along that mindset, something that has been on my mind for a few months after stumbling upon an enlightening book,  “The Tell-Tale Brain",  by Dr. V. S. Ramachandran, and his theory of the “mirror box”.  Its an amazing discovery, though simple in concept.

    The patient put his phantom limb on the nonreflecting side of the mirror and his normal arm on the reflecting side of the mirror. When the patient then looked at the reflecting side, it appeared as if the phantom limb had returned. (It was, in fact, a reflection of the patient's existing arm.)

    The mirror experiment

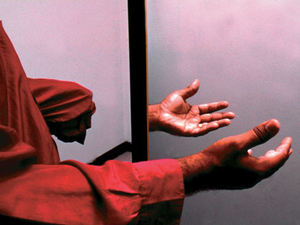
    "If the patient then starts moving his hand, clapping his hand or conducting an orchestra or waving goodbye while looking in the mirror, he's going to see the mirror reflection of the normal hand superposed on the phantom, moving in command with the command sent to the phantom arm," says Ramachandran. "So you're going to get the visual illusion that the phantom limb is obeying the command."

    Though patients know intellectually that their phantom limbs have not returned, they are able to successfully trick their brains into thinking that their limbs have returned.

    "It not only looks like it's there, it feels like it's there," says Ramachandran. "Patients say, 'When I move my normal hand, the phantom arm looks like it's moving. When I open the normal fist, the phantom hand — whose fist I could not open for months — suddenly feels as if it is opening as a result of the visual feedback, and the painful cramp goes away.' This is a striking example of modulation of pain signals by vision."

    Dr. V.S. Ramachandran, called the "Marco Polo of neuroscience" by Richard Dawkins, is the author of several books on the brain, including Phantoms in the Brain: Probing Mysteries of the Human Mind and A Brief Tour of Human Consciousness: From Impostor Poodles to Purple Numbers. He gave the 2003 BBC Reith Lectures and has published more than 180 papers in scientific journals including Nature and Science.


    So, I’ve  just been simmering on that concept for the past five months or so, thinking, “Hey, could this be helpful with coaching?”.  It was also during this time that I was fully immersing myself in Coach Mark Rodriguez’s 4D-FTP transition / footwork methods. 

    Yeah, sounds good and if it works, you’d look like a genius.  So the question is, it may work for the neurologist quack and his fancy book-learnin’, but is there any practical use in the “real world”?

    Well, when you stop and think about it – yes, there is, and its quite common.  Skilled dancers relyon instant reinforcement of mirrors in dance studios all the time.  Without it, performers may feel like they’re doing a great job, but quite possibly contorting themselves into horribly inefficient movements. 

    Also, think of the (real) purpose of all those mirrors in the gym.   No, they aren’t for you to practice your pose down for the Arnold Classic, but to reinforce strict form on your concentric/eccentric movements.  So, yeah…..I guess it IS a common practice when training the body to perform an action.

    I’ve always appreciated (and stressed the need for) filming practice and drill work to reinforce/review technique with players. While it has been helpful, I find the lack of immediate response rather deflating. Sure, you get to see what went wrong, what is correctable, but it usually requires another practice session hours away (or 24 hours after viewing) for an opportunity to get it right (then go through the same process, if audible cues aren’t successful). The point is – if you can get an immediate stimulus to how you (as an athlete) are performing, you could ‘self-correct’ instantly. The athlete could take cues not just from what a coach is telling him, but he would see and feel the peak body position.

    How could it be used? The key to technique is in the minutiae of movement; leverage, body position, feet and hips. I’m thinking foot placement ladder drills for DBs (or the 4D weave drills) or OLine stance/starts. Anything where you’re just concentrating on few movements in a short space. The player obviously would have to be in an environment where you are not pressed for time (so I’m thinking pre-practice), won’t be making contact, and where the eye-level/focus can be sacrificed to reinforce body position (in the mirror).

    If I were coaching this spring, I was planning on just using a simple full-length mirror (that you could get cheaply at any department store), place it horizontally along a DB ladder. With the player’s eye level through the mirror, they can see each step as they take it, and ensure they aren’t over striding, and are effectively placing their toes on the ground. You obviously wouldn’t use it in every drill, just when you’re trying to build those fundamental psycho-motor responses that are intuitive in great game performers.


    What are the drawbacks?

    1. It is different.
    2. It requires the athlete’s eye’s be diverted to a focal point you may not want to reinforce (if eyes are down for below-the-waist training).
    3. May not see an immediate (if any) benefit (you’re training muscle-memory…it is long-term process).
    4. Out on the field, equipment (mirror) is fragile and could cause a real mess. This is something probably reserved for indoors / at the Field House.

    I don’t know – maybe I’m just completely full of it.  Let us know what you think. It could help or it could be just a huge waste of time.

    Monday, January 24, 2011

    Wide Receiver Drills (Bobby Kennedy)

    I’ve been lacking in sharing position drills lately, so to pick up the slack here are some basic drills courtesy of former UT coach, Bobby Kennedy (now at CU).

    Just like the Texas Tech drills shared before, a majority of these drills are focused on pushing the stem, getting out of the break, and body control (and little to do with actually catching the ball).  In high school ball, this is probably the most undervalued and under-coached aspect of developing receivers.

    Friday, August 6, 2010

    BRONCO/SCIF Player

    As covered many times in various forms before, the fire zone blitz concept is prevalent in today's game. In this post, we'll cover probably the most under documented aspect of it, the SCIF player. Losing an underneath zone defender to pressure may cause some 'fundamentalist' thinking DC's to lose sleep... "how do you account for the four underneath zones"?

    The 5-man pressure package can seem complex or superfluous to many folks, treating it as an alien concept. If you already pattern-match from a MOFC, then adapting to the fire zone for your players and philosophy becomes a natural extension. When players understand zone coverage as it relates to pattern distribution, plugging and playing them into similar roles becomes feasible because of the shared skill set.

    When running a fire zone from a coverage standpoint, not much will actually change in the secondary. The fulcrum to this scheme will fall on the integrity of the SCIF/Bronco player, who controls the seams and matches the second receiver in the distribution. This player can be anyone within realistic alignment position (safety, linebacker, defensive end) near the seam. The beauty of the fire zone is its flexibility, you can bring anyone to match / fulfill the 3 underneath players.

    If the SCIF player is a member of the secondary, the adjustment is extremely simple. If it is being run out of a 3-man / odd front, there usually is no need to drop linemen to create a fire zone, so you would typically end up with a Dog, Backer, or Safety as the SCIF player. Whoever it may be, the rules and technique will remain the same. The goal is to control the seams, the area between 2 yards inside the hash extending out to the numbers. You are essentially expecting a sack or force a short throw (below the conversion down) and outside (difficult).

    This SCIF player must control the seams, which will be immediately threatened by the #2 receiver. On the snap, the defender will keep his eyes on the quarterback, bounce his feet (much like a Cover 4 safety), and easy pedal out with a slide step. Once recognizing drop back action from the quarterback, his eyes will snap to the #2 receiver and continue to slide for depth to stay on top of #2 at a depth of 10 yards.

    Because this is a pressure package, the throw, if it occurs, should be quick (under 2 seconds) and not allow the quarterback much time to process through his progressions. If the quarterback's shoulders are directed at the seam, the SCIF player should be expecting an inside or vertical route, to which he has out leveraged the receiver (eliminating the throw). The SCIF defender should know that once the quarterback's shoulders go OUTSIDE the seam (exaggerated toward the flat), there is no way for him to progress back inside (and even if he did, the 'final 3' player would handle it). Therefore, if the quarterback's shoulders turn outside the seam, the SCIF should work parallel (expand width) to the numbers (sideline).
    • If #2 pushes vertically on the seam, the SCIF should catch at 10 yards and carry. He is essentially looking to play 'catch' technique on a vertical stem by #2 with inside-out leverage.
    • If #2 runs a speed out, the SCIF should slide to his outside foot and bust to the curl route, expecting the #1 receiver to be there on a curl-flat combo. The SCIF should not jump the speed out (but anticipate #1 will be the #2 after the pattern distribution).
    • If #2 breaks inside (shallow) underneath 10 yards, the SCIF will attempt to deliver this receiver to the final 3 player in the hole with an outside leveraged collision.
    • If the quarterback's shoulders open AWAY from the SCIF player (he is backside), remember, the quarterback won't have time to work back inside, the SCIF should slide parallel inside, no further than 2 yards inside the hash and help squeeze the ball with the 'final 3' player.

    Where things get dicey is when you involve a lineman (end) in coverage as the potential dropper / SCIF player. This really becomes a run stunt because being away from the pressure overload, the defensive end's interior linemen will be stunting to his side. The nearest lineman will be looping to his "C" gap contain responsibilities, leaving the SCIF defensive end as a potential "B" gap filler. Below are some reinforcement drills on how the SCIF DE will mirror the back (load/flare) with leverage. The SCIF DE should always think of himself as a run-player FIRST, and a dropper only if there is no run action by the back.

    Thursday, July 29, 2010

    Fundamentals: Defensive Backs


    Ran across some great fundamental drills for honing man-to-man skills recently.
    .


    Very basic stuff, but the simplicity of repeating leverage on receivers in these drills and reinforcing the concept (and avoiding the unnecessary movements) is something to take away from these.

    Good luck this season.....

    Monday, July 12, 2010

    Ball Security Drills

    Ball Security is Job Security!

    Thanks to the guys from Hudl who helped me to figure out how to do these presentations with video. You can do some cool stuff with the Presentation feature in using video to teach your players. Here is some of our practice footage from this spring. Ball Security is a big priority, and when pressed for time, you can work it while you are doing something else, such as quick feet drills or during dynamic warm-up. Just give your guys a football and make sure they are maintaining proper Ball Security at the same time. That way you can kill two stones with one bird (sic). This is one way we start off our Offensive Indy time for our skill guys:

    Oh Snap!

    You need to install Silverlight to watch Hudl presentations.

    Download Silverlight

    Need help installing Silverilght? Click here.


    Oh Snap!

    You need to install Silverlight to watch Hudl presentations.

    Download Silverlight

    Need help installing Silverilght? Click here.


    Here is the link to the Hudl tutorial on creating a Presentation.

    Thursday, July 1, 2010

    RB Boom Drill

    Boom!

    Now a drill for the power backs. The off-arm is an under-utilized weapon for the RB. Most RBs know how to use the stiff-arm to keep a defender away from them; however once the defender is right on the RB, the Boom Drill is what we use to help them to run over the defender or break the tackle. We teach our RBs to use this right upon contact or immediately after contact to help gain separation from the defender trying to tackle them. It is a very violent and explosive move by the RB, especially the Marion Barber clip at the very end of the video. It happens so fast, that even though I slowed it way down, you can still barely see it.


    RB Boom Drill @ Yahoo! Video

    Saturday, June 26, 2010

    RB Spin Drill

    One of the very best coaches I have run into is Eddie Gran, now the RB Coach at Florida State. I had the privilege of working an Auburn camp a few years back and learned a ton. He has coached guys like Deuce McCallister, Rudi Johnson, Cadillac Williams, Ronnie Brown, and Monterrio Hardesty. I also got his drill video which is a tremendous teaching tool. It does not just have the drills, but it shows game cut-ups of the drills actually being used in the game (I added some slow-mo and a few game cut-ups at the end of the video below, too). When you show this to your RBs, they will be plenty motivated to learn these drills so they can put them to use in the game. Then once they experience some success with it, they will be even more motivated and will bug you to practice it over and over. One of my favorite drills featured here is the Spin Drill. One man simulates a defender who overpursues just a bit and then the RB spins inside him. Here it is:

    Thursday, June 10, 2010

    Zone Blocking - Ron Hudson (ULL)

    Ending the OL presentation, was ULL OC, Ron Hudson, discussing ULL's notorious rushing attack.

    Philosophy
    Linemen work playside gap to linebacker, which becomes a zone, gap, man-scheme.

    Rather than talk about hips and footwork, Hudson feels his emphasis on face and hands ("point with nose") is what helps his linemen grasp zone concepts faster ("in playside gap, put your nose to far number of defender").

    The question Hudson wants to present on every down is "Can the defense stretch with us"?
    Then he will see where the offense can stop just one of the defenders (from stretch) and gash them for a big run

    RB Coaching points (on zone)
    • Slide shuffle
    • Shoulder square to cocked to attack
    • Stay on track to aiming point
    • Press heels of OL
    OL Coaching points (on zone)
    Uncovered:
    • deep bucket step
    • 1,2,3 square
    • get vert
    Or
    • Shuffle (gain leverage)
    • then press (vertical)
    Covered:
    • Bucket step (lose ground to gain leverage)
    • Plant your face on far number (of DL covering you)
    • Take steam off slanter (DL moving away, stay on as he crosses your face)
    • Follow landmark (far number)
    Uncovered linemen work flipper / near leg (2nd step) / to near flipper:
    1. Lateral
    2. Flipper

    Hudson's approach with surface contact on zone is premised on kinetic loading through dipping the hips prior to engaging a defender. This becomes a 1, 2 step then (load) vertical jump through the defender. This is illustrated through his "Superman" drill shown below.
    Coaching Points for linemen
    • Don’t extend arms in run game (think tripod)
    • Throw face and hands on 2nd step
    • Dip hips to uncoil (helps timing)
    • Eyes to the sky when Crowther pumping (don’t drive through and bury your head)


    Zone Combos
    Ringo / Lucky / Triple (line) calls to communicate help into zone
    If the center hears a Ringo call– and near man (3 tech) comes, the nose doesn’t matter

    Triple is 3-man combo (and PST just 'hears' "Ringo", meaning he's on his own) between the BSG, C, and PSG

    uncovered center slams nose and works to Mike. He can work to slam the nose, and have the BSG work towards the Mike


    Uncovered center sees the near knee of the 3 tech come towards him, he will work to take him, while the PSG 'takes the steam off' the stick


    Cadence
    The cadence is ALWAYS on 1, and they don't have false starts because the center calls the cadence (though the QB calls the protection at the line). The cadence is a 2-syllable, 1-word ('SETHUT'). The center snaps the ball on the 'T' of SET. The rest of the line will rise out of their stance on the 'H' of HUT.

    When working freeze plays, the center can make a "Trout" call, declaring the TACKLE will call the cadence (great for aggressive defensive ends).

    ULL INSIDE RUN from ragin caucasian on Vimeo.

    Wednesday, May 26, 2010

    It's All Ball Security These Days! Perhaps You Need a Refresher Course!


    Hey, thanks to Brophy for lowering his standards and allowing me to be a contributor and post on his blog, lol. I will do my best to not screw it up too bad.

    Cripes! Let's get back to fundamentals! One of the worst-taught fundamentals IMO is ball security. Ball Security can win or lose 1-2 games a year. You can demonstrate, scream, up-down, beg, or plead, but the best way to teach ball security is to show your guys video. This is part of a video I made for my RBs last year. All of the sudden I became a 100 times better RB Coach because the video reinforced my teaching and motivated my RBs to hold on to the ball correctly. Check it out:


    Fundamentals of Ball Security:
    1. Two Finger Claw
    2. Wrist above Elbow
    3. Ball Tight to Chest
    4. Tuck Elbow In
    5. Opposite Hand Over Football on Contact
    6. Keep Pads Low

    My next post will look at some game tape of fumbles and show what mistakes were made.

    Tuesday, May 11, 2010

    Shuffle / Match

    There has been some inquiry into how to play shuffle (replacing the backpedal) in Cover 3, so here is a quick example of shuffle work with a run-through demo of the back-5 pattern-match drill discussed earlier.
    Now, although this player is good at shuffle, he is extending with the downfield foot. Ideally, it should be a push off with the upfield foot (left) and a catch with the downfield foot (right). Because he is extending / reaching with the upfield foot, he will be prone to over extending and consequently clicking the heels (bad leverage position/base). This also makes the transition more efficient and fluid. When the trail foot is the downfield foot, you can use it to direct the body like a rudder (rather than it being the 'drive-train'). Force is initiated by the upfield foot, after the 3 pushes (and come to balance) from the upfield foot, all the defenders needs to do to bail is pivot the downfield foot 45 degrees and this will pivot his hips and put him in a running position downfield. This is not unlike a handoff transition in a relay (baton).

    Also, we flew through the 5-DB drill for the sake of filming it (as a visual). We went about 3/4 speed. In practice, this will be full speed and a little more intense.

    Tuesday, May 4, 2010

    Cover 3 - back 5 guys

    Entering Week #2 of spring ball (practices #4-7), we are making better determinations on what roles players are best geared for. With so many numbers out, we have a legitimate option of going full 2-platoon (with the occasional 2-way specialist).

    I have been afforded a great opportunity to take the back 5 defenders in the secondary in our Cover 3 defense and rep every player on playing corner, strong safety, and free safety. This is going to be extremely beneficial for these young (and some veteran) players towards understanding their role within the coverage (and support) and seeing the big picture.

    We will probably stick to the following format for the remainder of the week, but it breaks down to two separate groups (of 10+ players) with 20 minutes of instruction (for all spots).

    I've been using this time to work at a break-neck pace in going over (as quickly as possible) the basic tenets of initial movement, then progressing into pattern-matching the 2-man game. We've only covered basic concepts because most of the players we have are freshmen.
    For simplicity's sake, I set up 3 different stations to quickly drill the initial movement (at the snap) for each position.

    These (cone) drills are set up on the field based on the position landmarks to better orientate the players to where the position exists on the field.
    • Free Safeties rep through a (3 step) backpedal at 12 yards in the middle of the field
    • Strong Safeties rep through a steep 45 degree zone drop 5 yards from the hash (to the curl), then reverse turn (back into the hash).
    • Corners rep through a (3 step) shuffle at 7 yards from the LOS, 1 yards inside the numbers. 3 step shuffle then turn and run downfield.
    After getting basic movement reps in, we go right to cramming pattern-matching down their throats.

    The fastest way to facilitate this was to work a 5-point rotating circuit.

    We align a #1 (outside the numbers) and #2 (outside the hash) receiver on cones. Then set up the corner (inside #1), strong safety (on the hash/splitting the difference), and free safety (in the middle of the field) respectively. The players 'enter' the circuit as a free safety and after each route run (1 & 2 running a concept), the players rotate to the successive spot, as follows;
    • 5 - free safety
    • 4 - strong safety
    • 3 - corner
    • 2 - #2 (inside) receiver
    • 1- #1 (outside) receiver
    We just coach the kids up on the fly from here in an effort to keep them all moving, relating and conditioning the key factors (alignment with the divider, movement technique, reading 2-to-1, responding to vertical stem, etc).


    We will see about getting them to digest more concepts through the week, but if we can handle verticals and smash (out of Cover 3), we should have our work cut out for us this spring.

    UPDATE:
    After two days of this routine (M&T), we broke off into segments of FS & Corners, and I got the Strong/Weak Safeties ( I just found out about this at practice, but whatevers clever ). This was great because it allowed me the opportunity to focus work on developing the safeties to handle job #1 - primary run force and tackling. Later, we joined up for skelly and scripted team sessions and I was pleasantly surprised at how well many of these first-time players (current freshmen) were picking up their roles and doing it methodically, driven by technique. No more cringing on watching #2 receivers running up the seams or perimeter players getting reached (see last season).....I just thought it was amazing, refreshing, reassuring to see how big of an impact the little things can make in a defense's performance. The corners (only one is a returning varsity player) were recognizing smash and verticals (instead of being 'man-conscious) - the point being we were able to throw a lot at the kids in 2 days to reduce our coverage liabilities.
    In related news, the Spring Handout (DVD) is ready to be published and I'll probably distribute it next week.
    This spring is helpful because we are able to add our 2 freshmen coaches to the varsity staff. By joining the varsity, they get a better idea of how we teach the scheme, drills to use, (to translate next season) and they can be utilized to handle some of the responsibilities (making it possible to split up the back 5 guys). With this DVD, even the other guy (who is primarily a basketball guy) can figure out precisely what it is we want to teach and identify what a DB is doing incorrectly in technique (here's a hint....it isn't just backpedalling to the endzone and 'keeping everything in front of you').


    here is just some Cover 3 clips of Penn State

    SIDEBAR